Quick Start using API
In this tutorial, we will show you step-by-step how to send documents to a DocumentPro Workflow using our REST API.
Prerequisites
- You need a DocumentPro account. If you haven't signed up yet, create an account here.
- Basic knowledge of making HTTP requests. We'll show examples in cURL, Python, and JavaScript.
- A document you want to send to a Workflow (we'll use an invoice as an example).
Step 1: Get Your API Key
An API key is created for your account automatically the first time you log in — you don't need to create a Workflow first to get one. Find it in your account settings in the DocumentPro app, or generate a new one from any Workflow's Import tab. This key works across all Workflows on your account.
Important: Keep your API key secure and don't share it publicly.
Step 2: Create a Workflow
Next, create a Workflow so you have a template_id to parse documents against.
- Log in to your DocumentPro account.
- Navigate to https://app.documentpro.ai/new-workflow.
- Set your Workflow name.
- In the Document Parsing section, set the document type.
- Click Configure Parser and add the fields you want to extract from your document. Save your configuration.
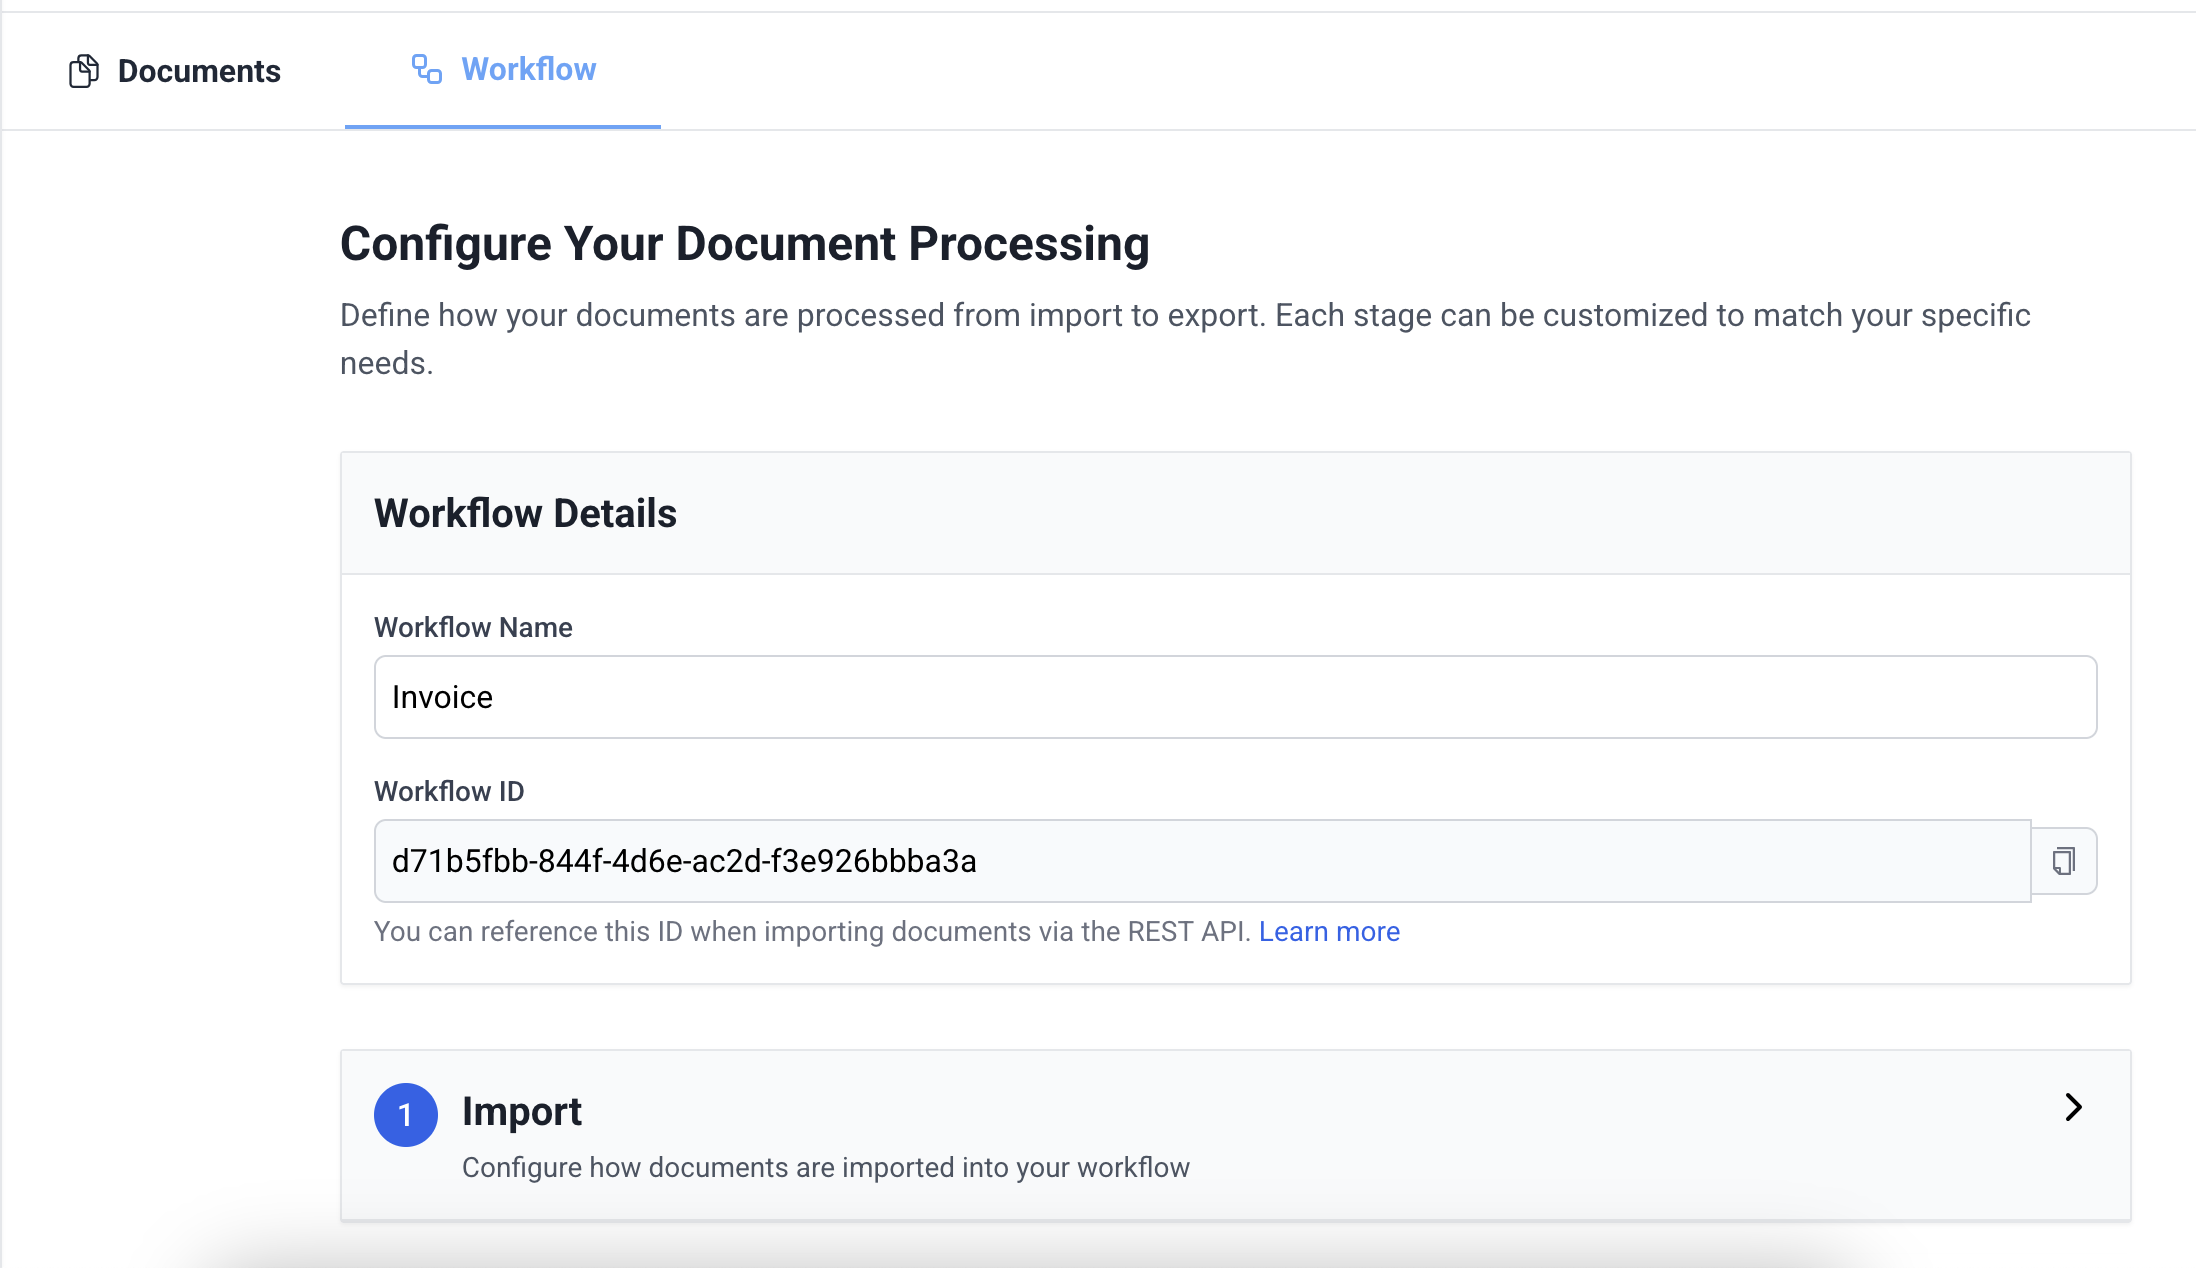
- Click Create Workflow. You'll be redirected to your new Workflow — note its
template_idin the Workflow tab.
Step 3: Upload a Document
First, we'll upload a document to DocumentPro using the API.
Using cURL
curl --location 'https://api.documentpro.ai/v1/documents' \
--header 'x-api-key: YOUR_API_KEY' \
--form 'file=@"/path/to/your/invoice.pdf"'
Using Python
import requests

url = "https://api.documentpro.ai/v1/documents"
files = [
  ('file', ('invoice.pdf', open('/path/to/your/invoice.pdf', 'rb'), 'application/pdf'))
]
headers = {
  'x-api-key': 'YOUR_API_KEY_HERE'
}

response = requests.post(url, headers=headers, files=files)
print(response.text)
Using JavaScript
const fs = require('fs');

const form = new FormData();
form.append('file', new Blob([fs.readFileSync('/path/to/your/invoice.pdf')]), 'invoice.pdf');

const response = await fetch('https://api.documentpro.ai/v1/documents', {
  method: 'POST',
  headers: { 'x-api-key': 'YOUR_API_KEY_HERE' },
  body: form
});
const result = await response.json();
console.log(result);
Replace YOUR_API_KEY_HERE with your actual API key, and update the file path to point to your document.
This API call will return a response containing the document_id. Save this ID as you'll need it for the next step.
Step 4: Send your Document to a Workflow
Now that we've uploaded a document, we can send it to the Workflow you created in Step 2. Use the document_id from Step 3 and the template_id from Step 2.
Using cURL
curl --location 'https://api.documentpro.ai/v1/documents/YOUR_DOCUMENT_ID_HERE/run_parser?template_id=YOUR_TEMPLATE_ID_HERE&use_ocr=true&query_model=gpt-4o' \
--header 'x-api-key: YOUR_API_KEY' \
--header 'Accept: application/json'
Using Python
import requests

document_id = "YOUR_DOCUMENT_ID_HERE"
template_id = "YOUR_TEMPLATE_ID_HERE"

url = f"https://api.documentpro.ai/v1/documents/{document_id}/run_parser"

headers = {
  'x-api-key': 'YOUR_API_KEY_HERE',
  'Accept': 'application/json'
}

params = {
    'template_id': template_id,
    'use_ocr': True, # Optional, defaults to Workflow setting
    'query_model': 'gpt-4o', # Optional, defaults to Workflow setting
}

response = requests.get(url, headers=headers, params=params)
print(response.text)
Using JavaScript
const documentId = 'YOUR_DOCUMENT_ID_HERE';
const templateId = 'YOUR_TEMPLATE_ID_HERE';

const params = new URLSearchParams({
  template_id: templateId,
  use_ocr: 'true',
  query_model: 'gpt-4o'
});

const response = await fetch(
  `https://api.documentpro.ai/v1/documents/${documentId}/run_parser?${params}`,
  { headers: { 'x-api-key': 'YOUR_API_KEY_HERE', 'Accept': 'application/json' } }
);
const result = await response.json();
console.log(result);
This API call will return a request_id. Save this ID for the final step. Extraction is asynchronous, so this call returns immediately with request_status: "pending" — the document isn't parsed yet.
Step 5: Retrieve the Results
Finally, poll for the parsed results using the request_id from the previous step. See Rate Limits & Polling for recommended polling intervals.
Using cURL
curl --location 'https://api.documentpro.ai/files?request_id=YOUR_REQUEST_ID_HERE' \
--header 'x-api-key: YOUR_API_KEY' \
--header 'Accept: application/json'
Using Python
import requests

request_id = "YOUR_REQUEST_ID_HERE"

url = "https://api.documentpro.ai/files"

headers = {
  'x-api-key': 'YOUR_API_KEY_HERE',
  'Accept': 'application/json'
}

params = {
  'request_id': request_id
}

response = requests.get(url, headers=headers, params=params)
print(response.text)
Using JavaScript
const requestId = 'YOUR_REQUEST_ID_HERE';

const response = await fetch(
  `https://api.documentpro.ai/files?request_id=${requestId}`,
  { headers: { 'x-api-key': 'YOUR_API_KEY_HERE', 'Accept': 'application/json' } }
);
const result = await response.json();
console.log(result);
This API call will return the parsed data from your document once request_status is "completed".
Conclusion
Congratulations! You've successfully used the DocumentPro API to create a Workflow, upload a document, run a parser on it, and retrieve the results. Here's a quick recap of what we did:
- Got the API key that was auto-created for your account.
- Created a Workflow on DocumentPro.
- Uploaded a document using the
/v1/documentsendpoint. - Sent the document to the Workflow using the
/v1/documents/{document_id}/run_parserendpoint. - Retrieved the parsed results using the
/filesendpoint.
What's Next?
- Explore the OpenAPI spec for a complete, machine-readable reference of every endpoint.
- Learn how to create a Workflow via the API instead of the web app.
- Check out our integration guides to see how you can incorporate DocumentPro into your existing workflows.
- See the MCP server reference if you're building with an AI coding agent.